How to Use Lightroom Presets Like a Pro (Even If You’re New to Editing)
If you’re new to photo editing, presets can feel a little intimidating. Are you supposed to just click and be done? Or tweak everything afterward?
Good news: presets are designed to make editing simpler, faster, and more enjoyable, not complicated.
Here’s a step-by-step guide to using Lightroom presets with confidence, even if you’ve never edited a photo before.
Tip: If you want to start with a curated set of presets that match these steps, check out my preset collection. They’re designed to work in a variety of lighting and moods.
Step 1: Start With Any Photo
No photo is “too simple” or “imperfect.”
You don’t need:
A professional camera
Perfect lighting
Correct exposure
A specific type of photo
If the photo means something to you, it’s perfect for editing.
Presets are designed to enhance your photos, not judge them. Bright, dark, slightly off in color, or taken quickly on your phone, you can still start editing.
Tip: Presets work best when the photo has a clear mood — daytime, nighttime, indoor, outdoor — but even that isn’t a rule. Think of presets as a creative starting point, not a strict filter.
Step 2: Install Your Preset (One-Time Setup)
Once you buy a preset, you only need to install it once, then it’s ready whenever you need it.
2.1 Download the Preset Files
After purchase, you’ll receive a download link or email.
Download the files to your computer or phone
If the file is zipped, you can choose to unzip it. This allows you to import individual preset instead of the whole collection
Inside, you’ll typically see:
.xmpfiles → for Lightroom Desktop and Mobile.dngfiles → for Lightroom Mobile
2.2a Installing presets in Lightroom Classic (version 7.3+) on Mac or Windows
In Lightroom, open Develop Module → File → Import Profiles and Presets
Navigate to the Presets folder and pick the
.zipfile, or select already unzipped.xmpfiles.Presets are now ready to use in the Presets section on the left.
2.2b Installing presets in Lightroom CC on Mac or Windows
Open Lightroom CC and select an image.
Click File → Import Profiles and Presets.
Navigate to your
.zipor.xmpfile and import.Open the Presets Panel on the right and click a preset to apply.
2.2c Installing presets in Lightroom Mobile
Transfer the downloaded
.zipfile to your mobile device.Open Lightroom Mobile and select a photo.
Go to Presets → Three-dot menu → Import Presets
Navigate to your file and import.
Access them via Presets → Yours → User Presets.
Step 3: Apply the Preset
Open the photo you want to edit.
Tap the Presets panel at the bottom of the screen.
Select the preset group you saved.
Tap a preset to apply it instantly.
Remember: Presets give your photo a starting mood, but you can fine-tune from here.
Step 4: Adjust Exposure (Make It Feel Right)
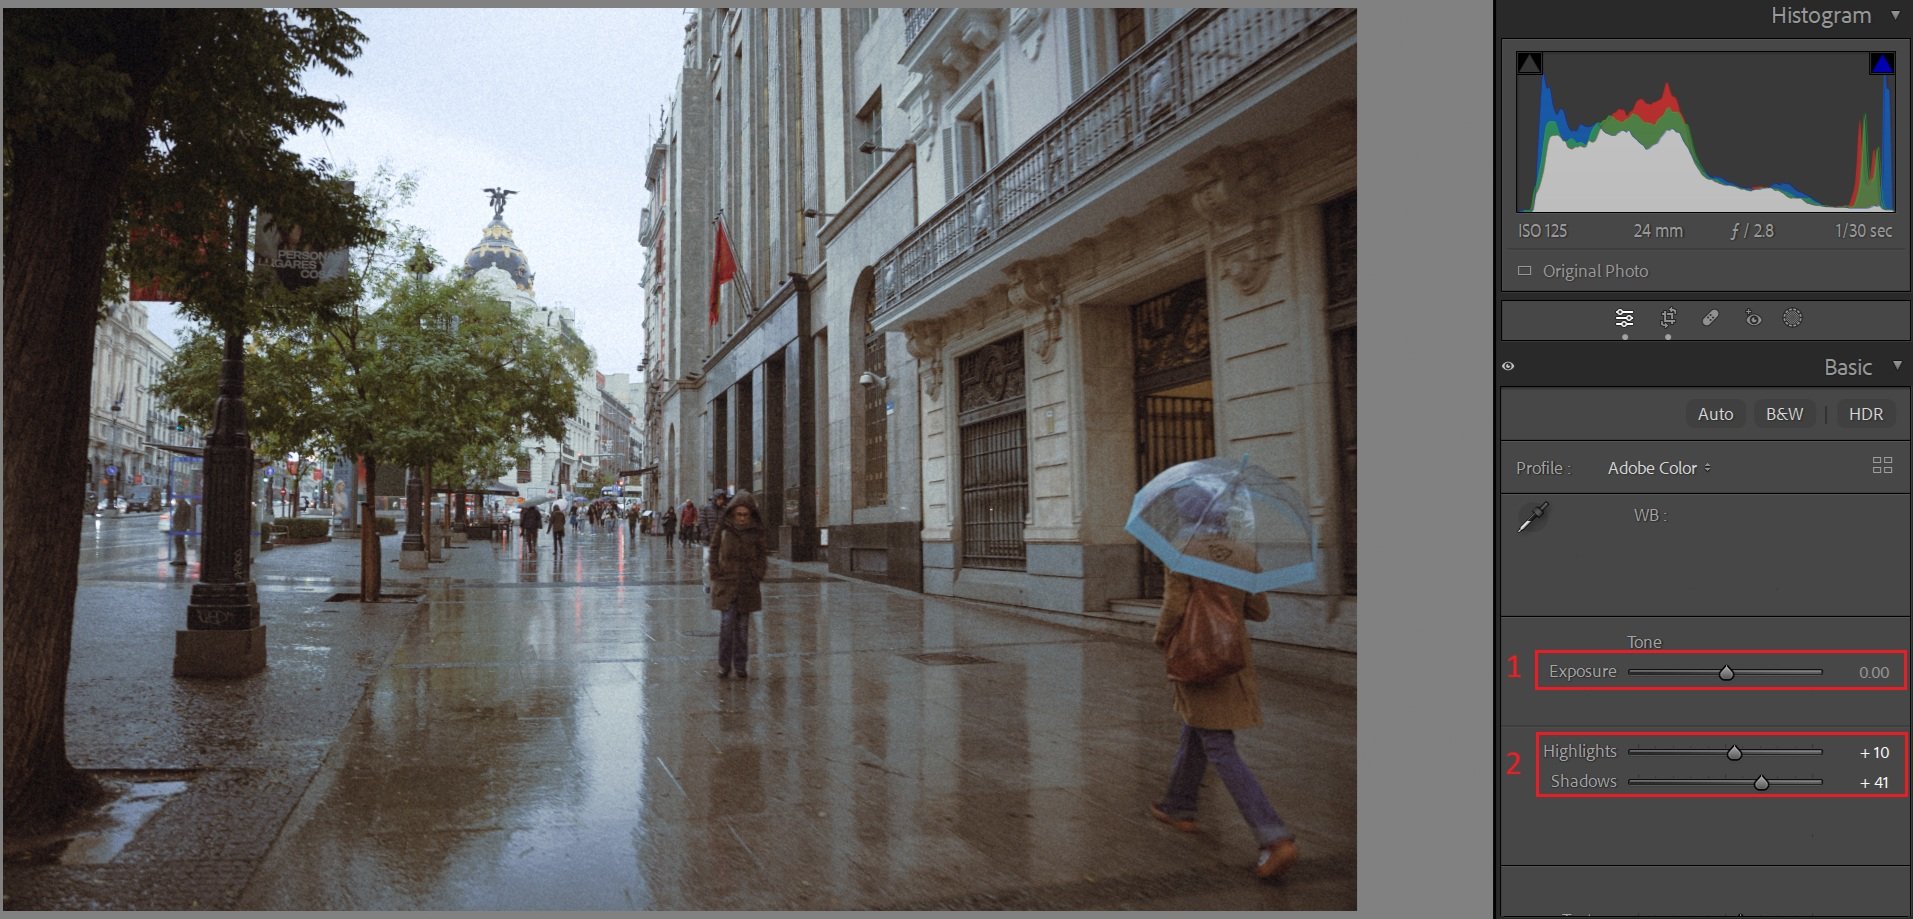
Fine-tuning exposure after applying a preset, adjusting brightness to match the mood and feeling of the moment.
After applying a preset, start with exposure.
If your photo is too bright or too dark, gently move the Exposure slider until it looks right to you. There’s no correct number — trust your eyes.
What to Look For:
Can you see details clearly?
Does it feel like how you remember the moment?
Is it balanced, not harsh?
Small tweaks:
Highlights → reduce if lights are strong
Shadows → lift slightly to recover details
Tip: Adjusting exposure is not “breaking” the preset — it’s fine-tuning.
Step 5: Adjust White Balance (Optional, Based on Your Style)

Adjusting white balance after applying a preset to refine warmth and color mood while staying true to personal style.
White balance controls how warm or cool your photo feels.
If the photo looks slightly off, adjust:
Temperature → warmer or cooler
Tint → slightly more green or magenta
My Personal Preference:
I often leave this as-is because I enjoy darker, moodier tones. Sometimes a slightly cool or tinted look adds character and atmosphere.
Remember: Not every photo needs to look “neutral”.
Step 6: Add a Mask (Final Touches, Optional)
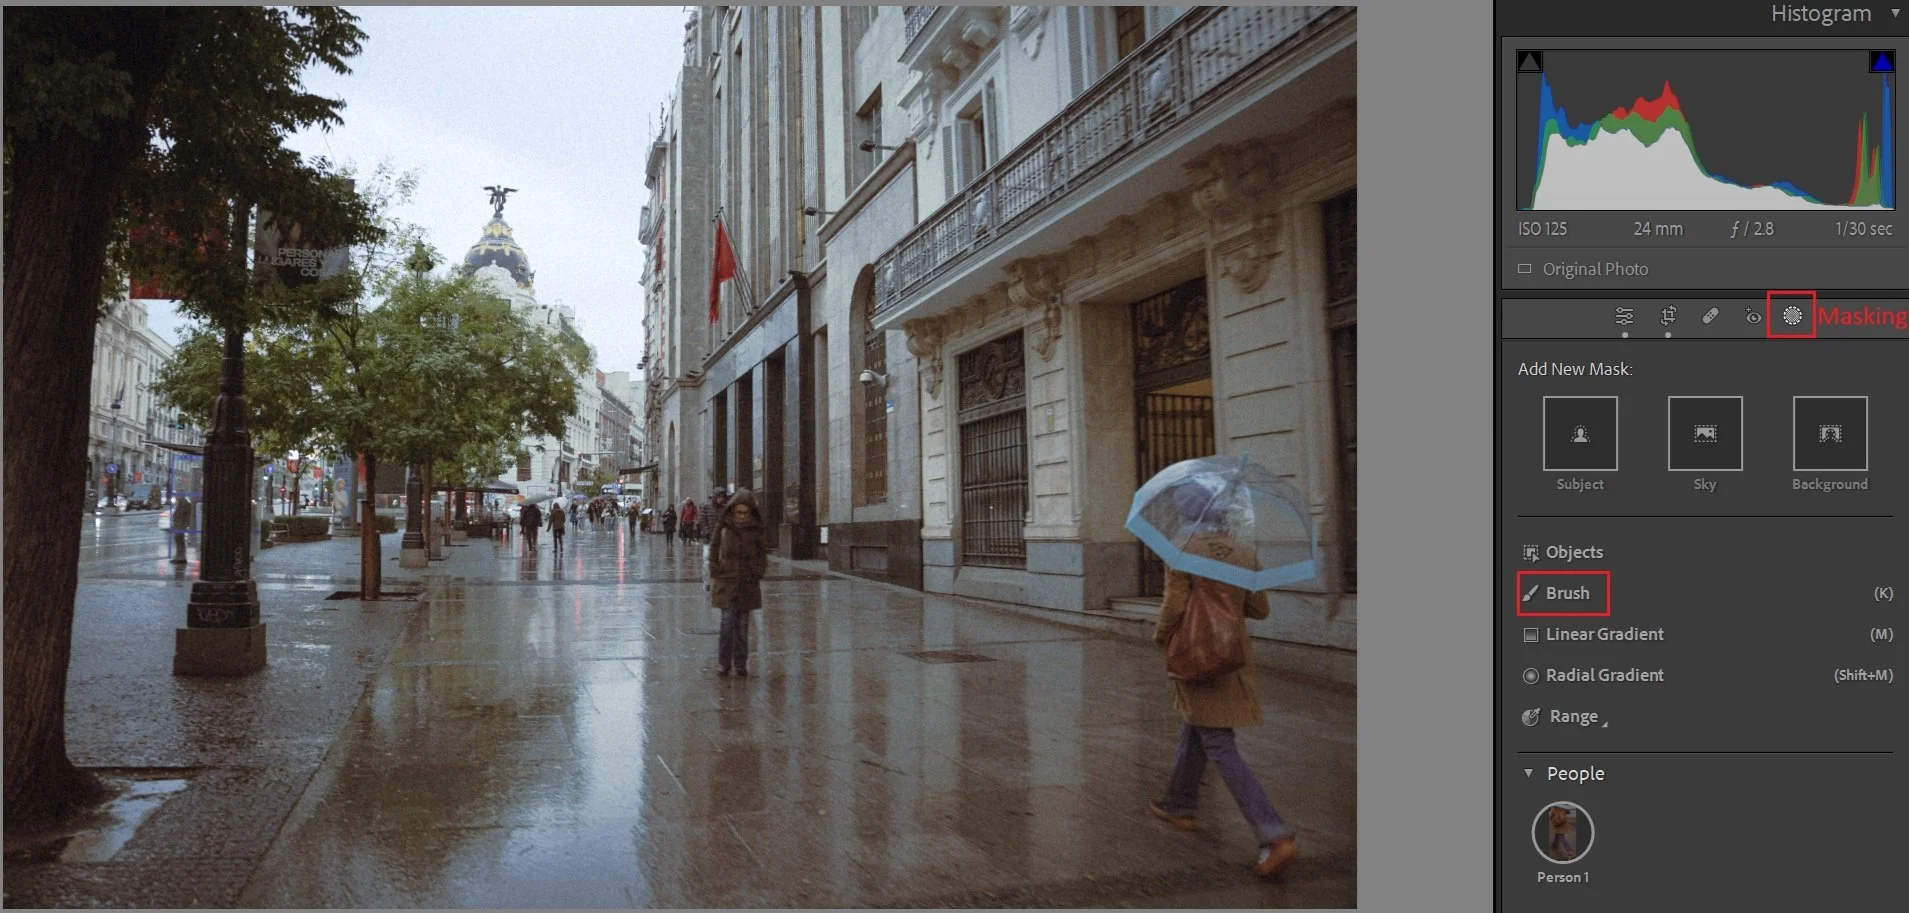
After applying the preset and adjusting basic sliders, you can use a mask to refine your image: add fog, shadows, or style to specific areas without changing the whole image.
How to Use a Mask
Select the Brush Tool (or Mask Tool).
Create a brush for the area you want to adjust.
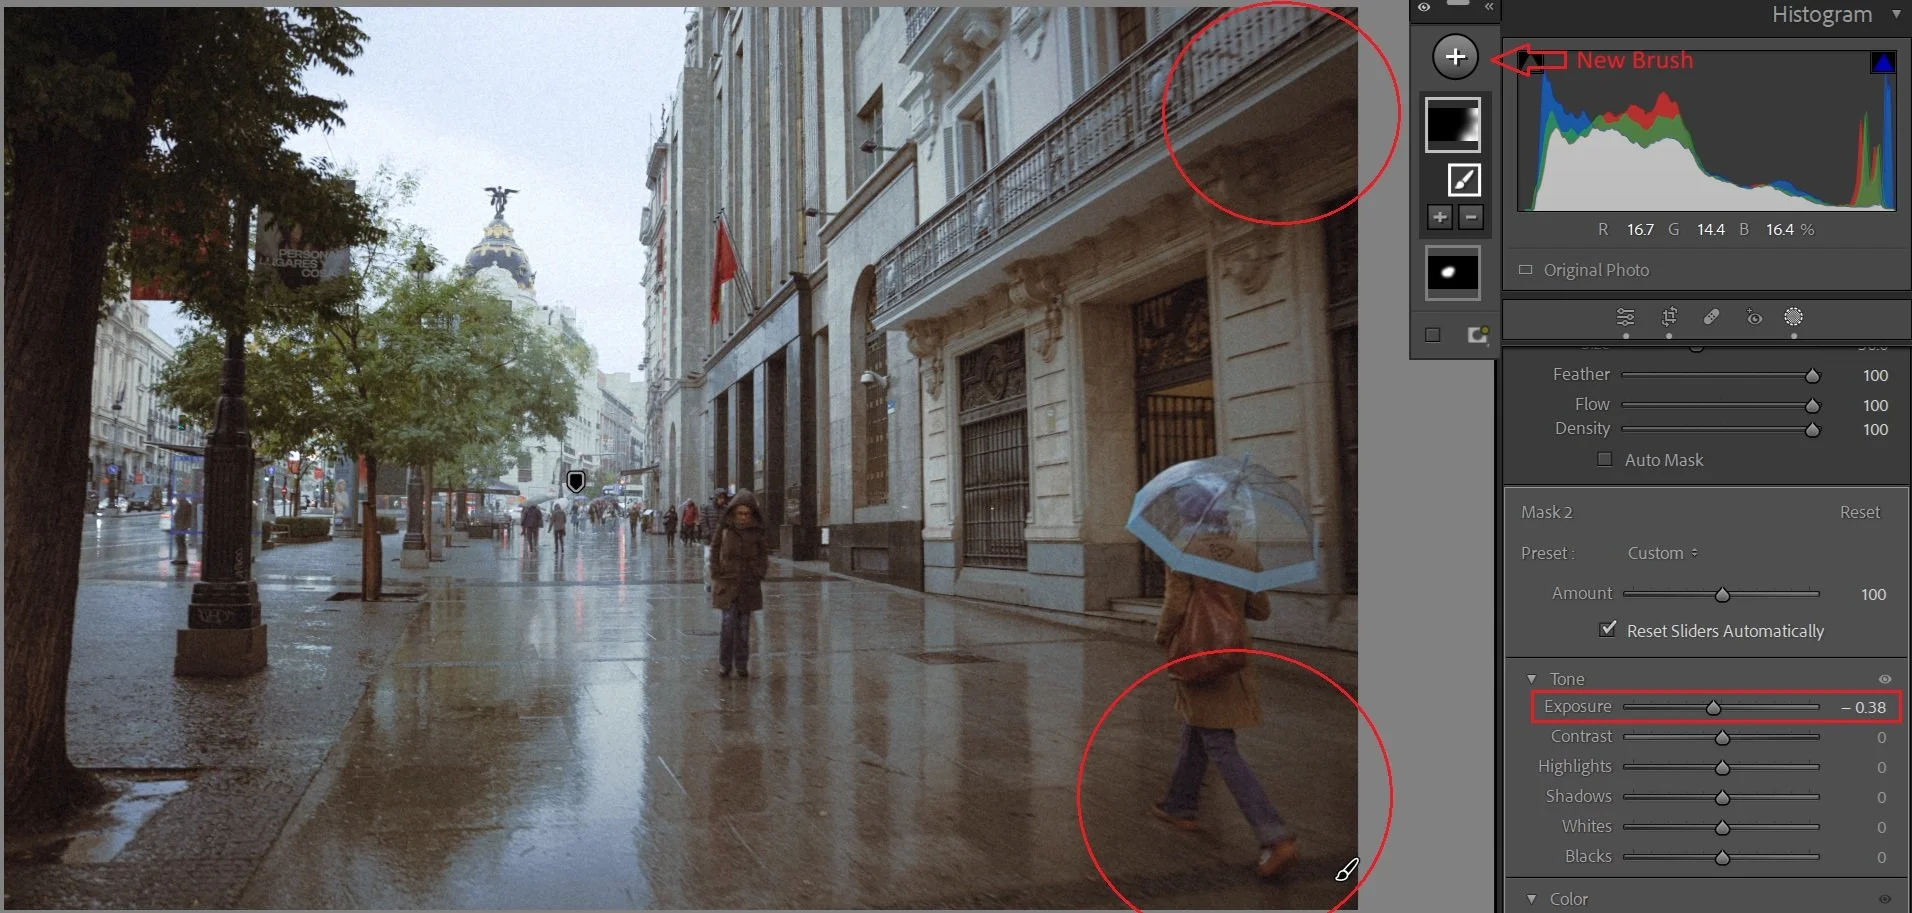
Two options:
Brush first, then adjust sliders, or
Adjust sliders first, then brush over the area.
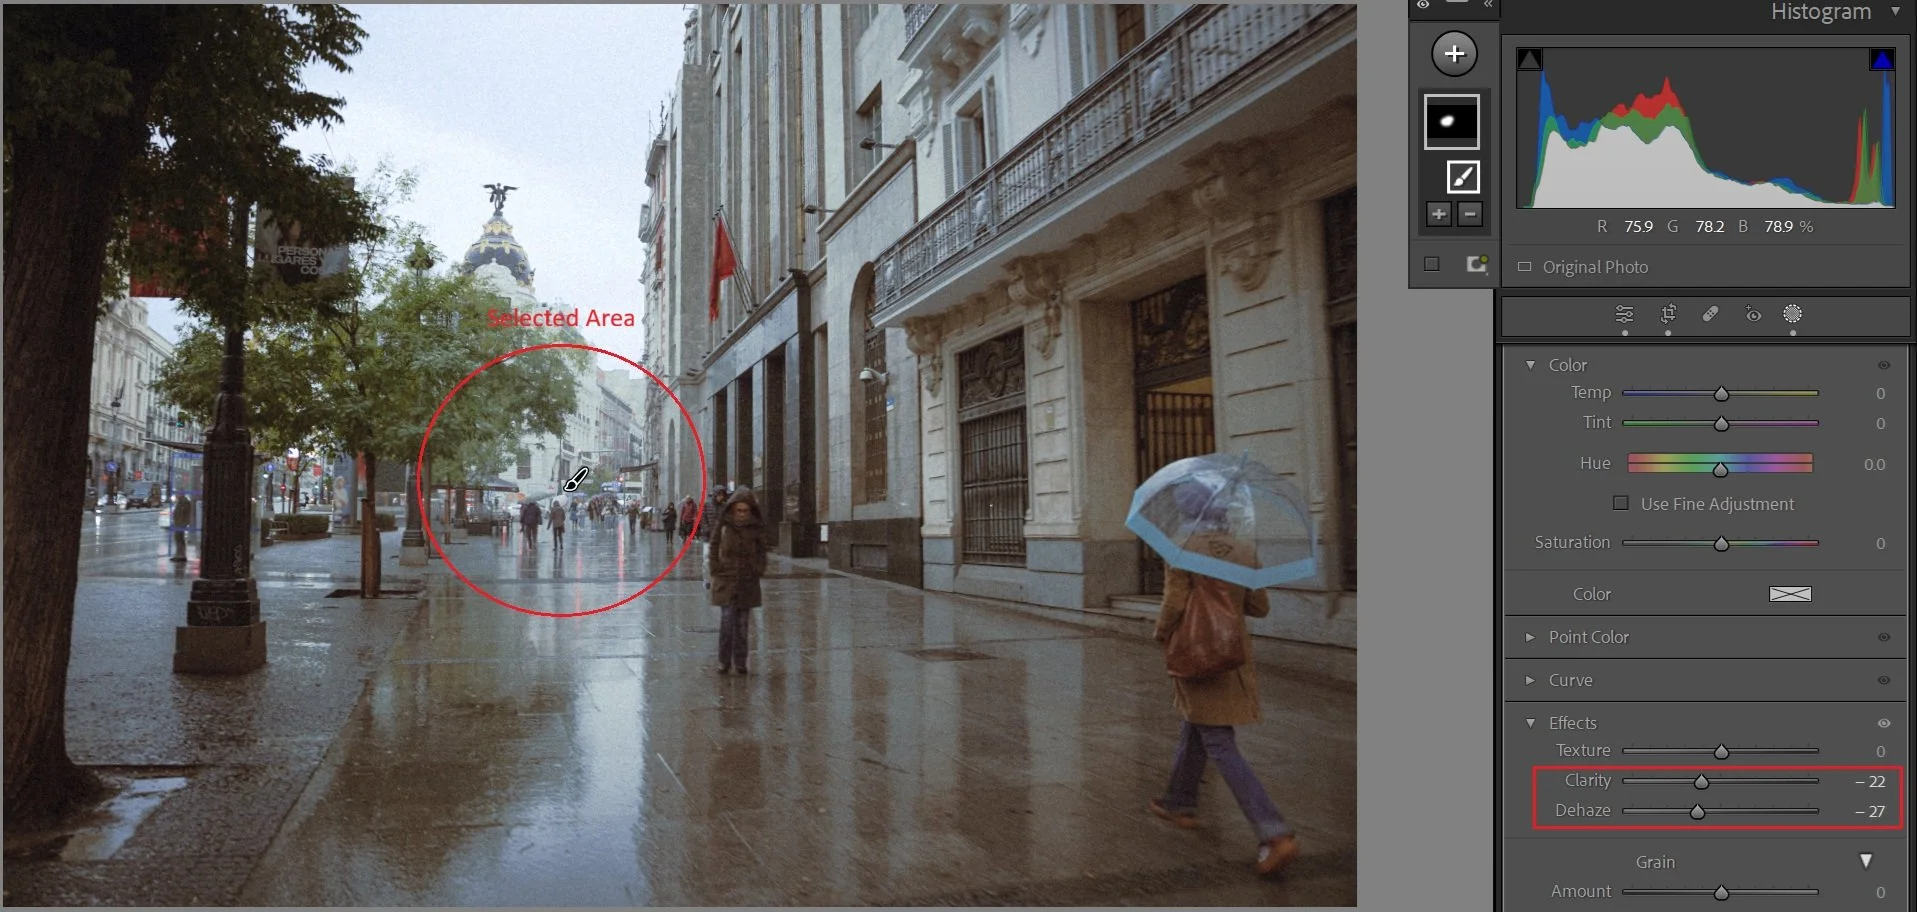
Apply adjustments such as:
Exposure
Clarity
Dehaze (negative for softer, moodier tones)
Temperature/Tint
Shadows to add depth
This allows you to enhance specific areas. Add tones, fog, shadows, or style, without affecting the whole photo.
My Personal Preference:
Touch of negative dehaze to soften areas
A bit of negative clarity for emphasis
Masking at the end helps fine-tune the mood and maintain a cinematic, atmospheric look
Remember: Masking is about fine-tuning mood, not perfection.
Step 7: Knowing When to Stop Editing (Less Is More)
After fine-tuning, it’s tempting to keep adjusting every slider. Often, the simplest edits are the best.
Ask yourself:
Does this photo feel like the moment I remember?
Am I happy with the mood and atmosphere?
Is there anything else that genuinely improves it?
If yes — stop editing.
My Personal Preference:
I often leave photos slightly darker or imperfect in color, it preserves the feeling and emotion. Presets save you time and let your personality shine through.
Step 8: Use Presets for Consistency
Presets help your photos look cohesive across multiple images, even in different lighting or locations. Apply the same preset (or a few presets with similar moods) across a series to create a consistent style for:
Travel albums
Personal projects
Social media feeds
Tip: Even when using the same preset, I make small per-photo adjustments — exposure, shadows, or tint, to match the light. But the overall color and mood remain consistent, keeping galleries polished and cinematic.
Final Thought
Presets are more than a shortcut. They’re a tool to express your creative vision. Play, experiment, and enjoy the process. If you want to start with a set that matches these steps, check out my curated preset collection.